Console - Despatch - Scan/Search Order
Description
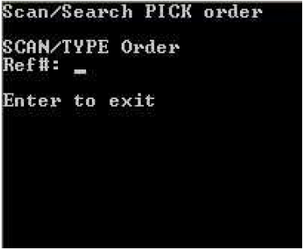
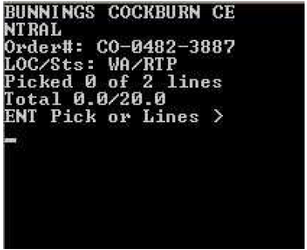
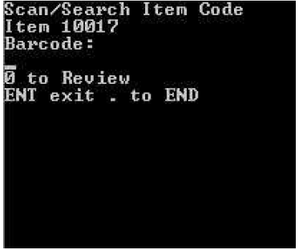
The Console Scan search requires the user to either key a reference# or Scan the Pick reference barcode number. The PCK-XXXX-XXXX and the REF# will display the correct pick order.
Detail Steps
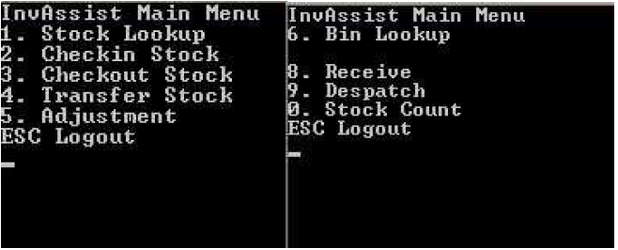
Step 1. Turn on the handheld and from the Console Menu Press Down Arrow then Select option 9. Dispatch.
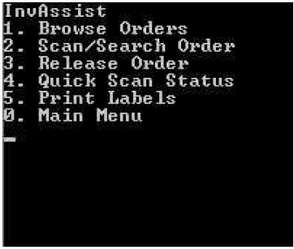
- Press 1 to Browse an Order - Go to Console - Despatch - Browse Order.
- Press 3 to Release an Order - Go to Console - Despatch - Release Order.
- Press 4 to Quick Scan/Despatch an Order - Go to Console - Despatch - Quick Scan Status.
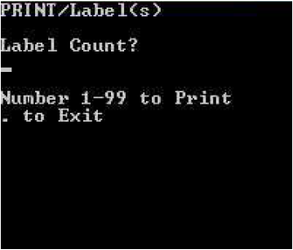
- Press 5 to Print Labels - Go to Console - Despatch - Print Labels.
- Press 0 to return to Main Menu.
- Press Enter key to Exit - Return to Step 2.
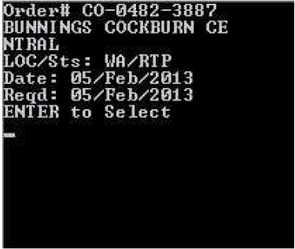
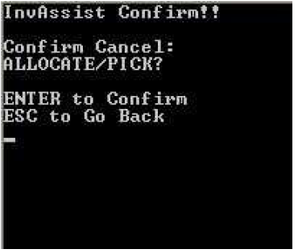
Step 4. Confirm Correct Order is Scanned.
- Press ENTER Key to Confirm - Proceed to Step 5.
- Press ESC key to exit - Return to Step 3.
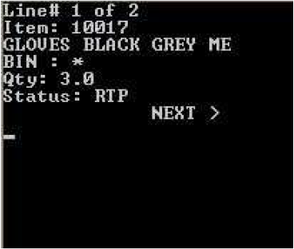
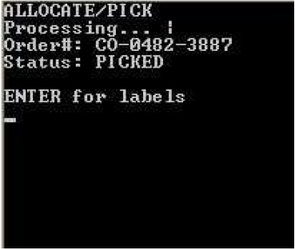
Step 5. Review Lines or Start Picking.
- Press Right Arrow Key to view Item Lines on order - Proceed to Step 5.
- Press ENTER Key to start picking line items - Proceed to Step 7.
- Press ESC key to exit - Return to Step 3.
- Use Left and Right Arrow Keys to Scroll between and Review Line Items.
- Press ESC Key to exit - Return to Step 5.
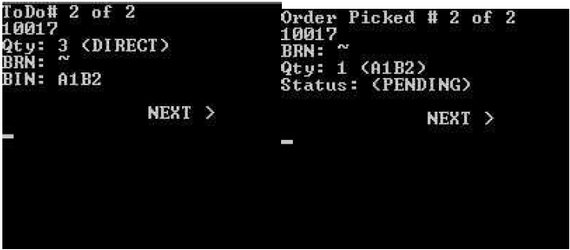
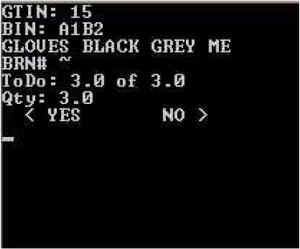
Step 7. Pick Line Items.
Note: ToDo refers to number of items that still require picking
This item has been picked and is awaiting final confirmation.
- Use Left and Right Arrow Keys to Scroll between Line Items.
- Press ENTER key to select item for picking - Proceed to Step 8.
- Press ESC Key to exit - Proceed to Step 14.
When all items are at Status Press Enter to Process Order - Proceed to Step 12.
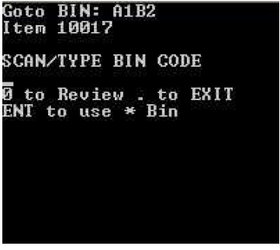
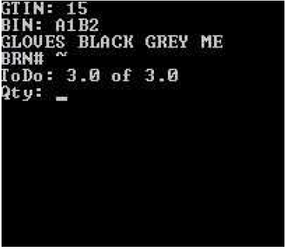
Step 8. Scan or Type Bin Location. Proceed to Step 9.
- Press 0 follow by Enter to Review Pick Lines - Return to Step 7.
- Press ENTER key to use *. “*” is used as a default Bin Location - if their is no Bin Location assigned to the item. Proceed to Step 9.
- Press ESC Key to exit - Proceed to Step 15.
- Press 0 follow by Enter to Review Pick Lines - Return to Step 7.
- Press ENTER or . Key to exit - Proceed to Step 15.
- Press Left Arrow to Alter/Edit Quantity - Proceed to Step 11.
- Press Right Arrow to Confirm Quantity - Repeat Steps 7 to 10.
Note: By default this is set to scan each individual item. To manually Enter a Quantity the correct preference needs to be set up.
- Enter or Scan New Quantity - Return to Step 10.
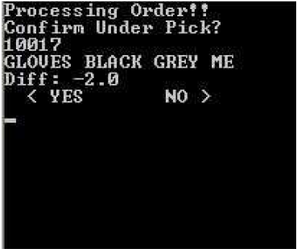
Note: If Order is Under or Over Picked Confirmation Message will appear for each line item that is under or over picked with the below options given.
- Press Right Arrow to Complete Picking (will minus under pick stock from order) - Proceed to Step 13.
- Press Enter to Print Carton Labels - Proceed to Step 16.
- Press Left Arrow Key to Confirm Cancel - Return to Step 3.
- Press Right Arrow Key to Return to Picking - Return to Step 7.
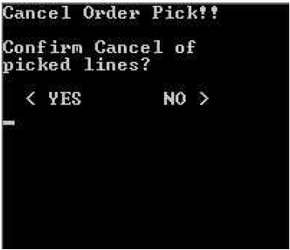
- Press Enter Key to Confirm Cancel - Return to Step 3.
- Press ESC Key to Return to Picking - Return to Step 8.
Note: Carton Labels will used Assigned printer and Assigned Label form.
- Press . to exit without Printing Return to Step 3.
Related Information
“LOC :” Warehouse Location.
“Sts :” Order Status.
“BIN :” Bin Location. * is set as default bin. Used to represent items without a Bin location assigned.
“BRN# :” refers to Batch/Serial Number. ~ is set as the batch/serial default. Used to represent items not batch/serial tracking.
Need Assistance?
Call 1800 137 032 Email support@datapel.com