Console - CheckIn Stock
- Former user (Deleted)
- kbadmin
Description
The Console CheckIn is only used when there is no existing Purchase Order within the Receiving Registry. More commonly known as a Blind Recieve.
If there is currently an Open Order within the Receiving Registry the follow the workflows to Console - Receiving.
Detail Steps
Note: Please note the steps below are the steps required to perform a typical Checkin Console Workflow. You may find your workflow is slightly varied i.e. one or two steps missing, order of steps slightly varied.
Step 1. Turn on the handheld and from the Console Menu Select option 2. Checkin Stock.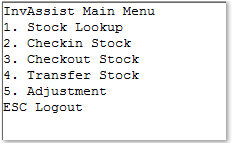
- Press 0 to return to Main Menu
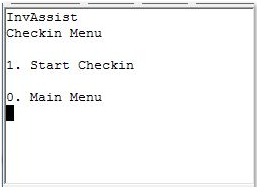
- 0 key returns to the CheckIn Menu - Return to Step 2.
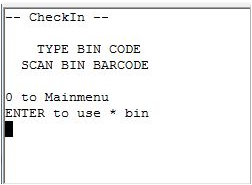
- “*” is used as a default Bin Location - if their is no Bin Location assigned to the item Press Enter.
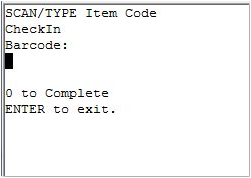
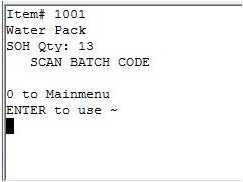
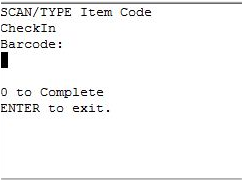
Step 4. Key in item number or scan item barcode number.
- Enter key returns to the CheckIn Menu - Return to Step 2.
- 0 Key processes/records the Check In (At least one item must be check in for anything to record) - Go to Step 10.
- ”~” is the default batch/serial number - Press enter if the item it not using batch/serial numbers.
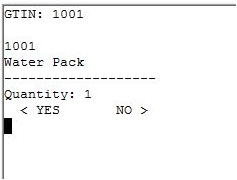
Step 6. By Default the Check In Quantity is set to the value of 1;
- If Quantity value 1 is true go to Step 8.
- If Quantity value 1 is false and needs adjusting go to Step 7.
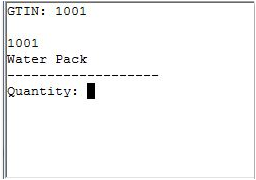
Step 7. To Adjustment the Quantity – Press the right arrow button, enter the correct quantity and press Enter.
- Proceed to Step 8.
Step 8. To Confirm the Quantity is correct – Press the left arrow button.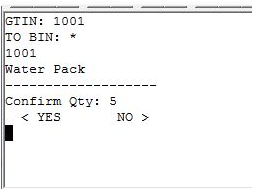
- Press 0 Key to process the Check In. - Go to Step 10.
- Press Enter to exit (returns to Check In Menu) and not record/cancel the Check In.
Step 10. Press Enter button to continue and repeat Steps 2. to 9. to create new Check Ins.
- Press ESC Key to Return to Main Menu.

Related Information
“BIN :” Bin Location. * is set as default bin. Used to represent items without a Bin location assigned.
“BRN# :” refers to Batch/Serial Number. ~ is set as the batch/serial default. Used to represent items not batch/serial tracking.
“LOT# :” Pallet Lot Location. 0 is default pallet Lot Location.
“GTIN” Barcode Number
Need Assistance?
Call 1800 137 032 Email support@datapel.com