Console - Despatch - Browse Orders
- Former user (Deleted)
- kbadmin
Description
When Browsing Despatch Orders on the console by default the orders are listed by in order of Promise/Required date.
Detail Steps
Step 1. Turn on the handheld and from the Console Menu Press Down Arrow then Select option 9. Dispatch.
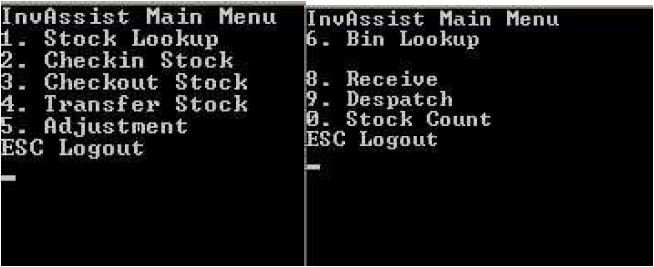
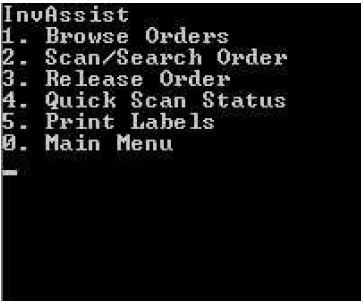
Step 2. Select 1. Browse Orders to review/lookup open Despatch Order/s.
- Press 2 to Scan/Search an Order - Go to Console - Despatch - Scan/Search Order.
- Press 3 to Release an Order - Go to Console - Despatch - Release Order.
- Press 4 to Quick Scan/Despatch an Order - Go to Console - Despatch - Quick Scan Status.
- Press 5 to Print Labels - Go to Console - Despatch - Print Labels.
- Press 0 to return to Main Menu.
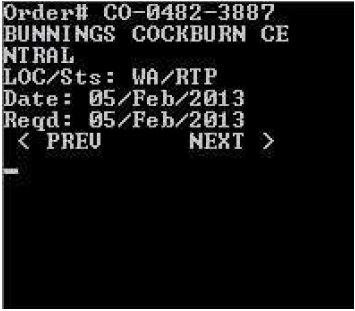
Step 3. Browse Orders.
- Press ESC key to Exit - Return to Step 2.
- Use Left and Right Arrow Keys to scroll between orders.
- Press ENTER key to Select Order - Proceed to Step 4.
Step 4. Review Lines or Start Picking.
Press Right Arrow Key to view Item Lines on order - Proceed to Step 5.
Press ENTER Key to start picking line items - Proceed to Step 6.
Press ESC key to exit - Return to Step 3.

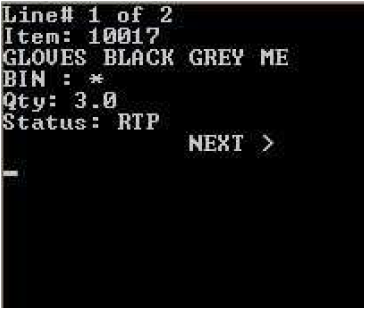
Step 5. Review Line Items.
- Use Left and Right Arrow Keys to Scroll between and Review Line Items.
- Press ESC Key to exit - Return to Step 4.
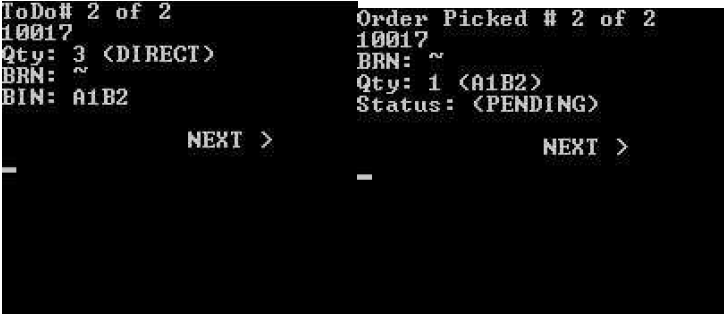
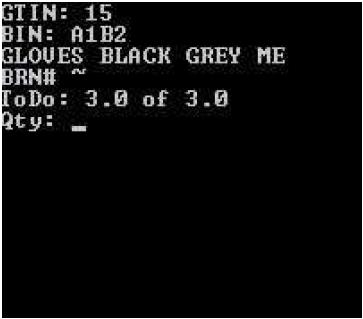
Step 6. Pick Line Items.
Note: ToDo refers to number of items that still require picking
This item has been picked and is awaiting final confirmation.
- Use Left and Right Arrow Keys to Scroll between Line Items.
- Press ENTER key to select item for picking - Proceed to Step 7.
- Press ESC Key to exit - Proceed to Step 13.
When all items are at Status Press Enter to Process Order - Proceed to Step 11.
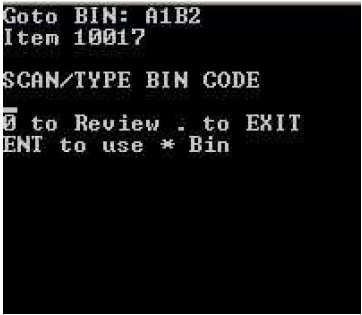
Step 7. Scan or Type Bin Location. Proceed to Step 8.
- Press 0 follow by Enter to Review Pick Lines - Return to Step 6.
- Press ENTER key to use *. “*” is used as a default Bin Location - if their is no Bin Location assigned to the item. Proceed to Step 8.
- Press ESC Key to exit - Proceed to Step 14.
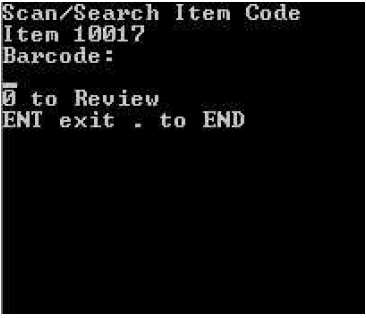
Step 8. Scan Barcode or Type Item Code. Proceed to Step 9.
- Press 0 follow by Enter to Review Pick Lines - Return to Step 6.
- Press ENTER or . Key to exit - Proceed to Step 14.
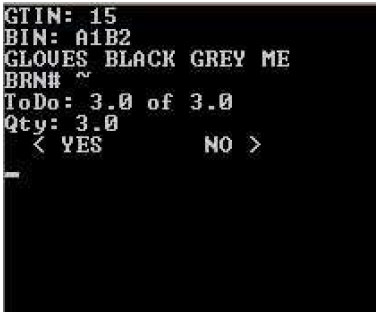
Step 9. Confirm or Alter Pick Quantity.
Note: By default this is set to scan each individual item. To manually Enter a Quantity the correct preference needs to be set up.
- Press Left Arrow to Alter/Edit Quantity - Proceed to Step 10.
- Press Right Arrow to Confirm Quantity - Repeat Steps 6 to 9.
Step 10. Edit Pick Quantity.
Note: By default this is set to scan each individual item. To manually Enter a Quantity the correct preference needs to be set up.
- Enter or Scan New Quantity - Return to Step 9.
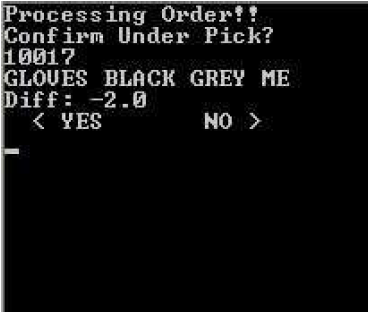
Step 11. Processing Order. Proceed to Step 12.
Note: If Order is Under or Over Picked Confirmation Message will appear for each line item that is under or over picked with the below options given.
- Press Right Arrow to Complete Picking (will minus under pick stock from order) - Proceed to Step 12.
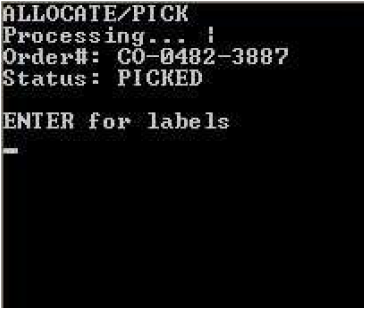
Step 12. Processing Complete.
- Press Enter to Print Carton Labels - Proceed to Step 15.
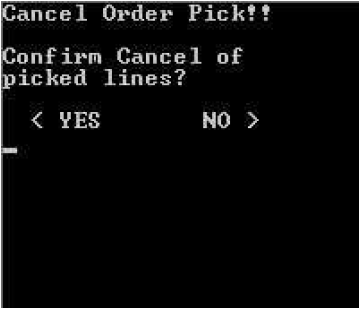
Step 13. Cancel Picking Process (Action from Step 6).
- Press Left Arrow Key to Confirm Cancel - Return to Step 3.
- Press Right Arrow Key to Return to Picking - Return to Step 6.
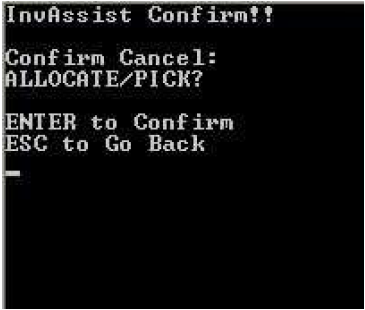
Step 14. Cancel Picking Process (Action from Step 7).
- Press Enter Key to Confirm Cancel - Return to Step 3.
- Press ESC Key to Return to Picking - Return to Step 7.
Step 15. Enter Quantity of Carton Labels to Print. - Return to Step 3.
Note: Carton Labels will used Assigned printer and Assigned Label form.
Note: Carton Labels will used Assigned printer and Assigned Label form.
- Press . to exit without Printing Return to Step 3.

Related Information
“LOC :” Warehouse Location.
“Sts :” Order Status.
“BIN :” Bin Location. * is set as default bin. Used to represent items without a Bin location assigned.
“BRN# :” refers to Batch/Serial Number. ~ is set as the batch/serial default. Used to represent items not batch/serial tracking
Need Assistance?
Call 1800 137 032 Email support@datapel.com