Console - CheckOut Stock
- Former user (Deleted)
- kbadmin
Description
The Console CheckOut is only used when there is no existing Pending Order within the Despatch Registry. More commonly known as a Blind CheckOut.
If there is currently an Open Pending Order within the Despatch Registry then follow the workflows to Console - Despatch - Scan/Search Orders.
Detail Steps
Note: Please note the steps below are the steps required to perform a typical CheckOut Console Workflow. You may find your workflow is slightly varied i.e. one or two steps missing, order of steps slightly varied.
Step 1. Turn on the handheld and from the Console Menu Select option 3. CheckOut Stock.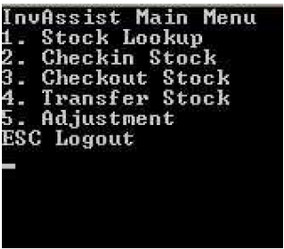
- Press 0 to return to Main Menu
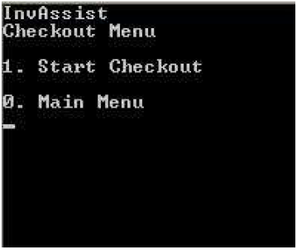
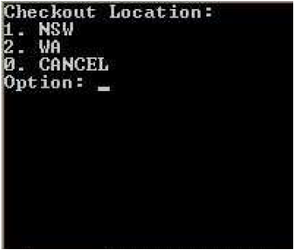
- Use Down and Up Arrows on keypad to scroll between location pages (if applicable).
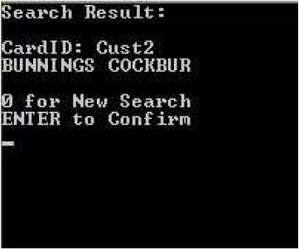
Step 4. Enter in a Customer Card ID that the goods will be checked out to.
- If a Default Customer ID has been setup then press Enter key to select the default Customer.
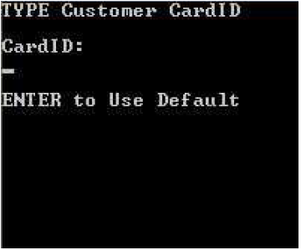
- Enter to Confirm Select Customer - Proceed to step 6.
- 0 to Select a Different Customer - Return to Step 4.
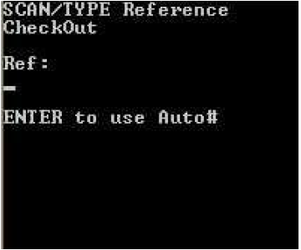
Step 6. Enter in a Reference number for the Check Out.
- Press Enter will use the next Sequential Reference number within the system as per your preference settings.
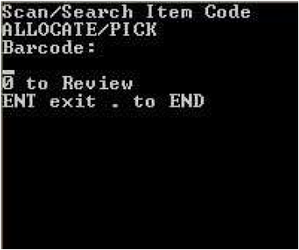
Step 7. Scan Item Barcode or Enter a Item Code
- ENTER key to exit/cancel - Return to Step 2.
- 0 to Review Order Proceed to Step 11.
- "." key to End/Complete Order Proceed to Step 12.
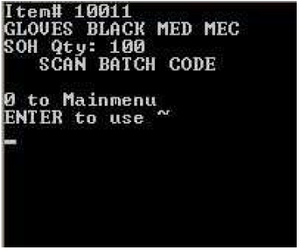
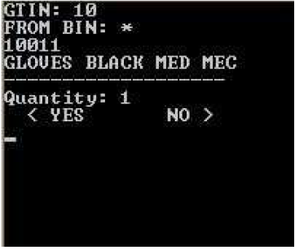
Step 8. Scan or Enter Batch/Serial Code.
- ”~” is the default batch/serial number - Press Enter key if the item it not using batch/serial numbers.
- Press Left Arrow to Edit Check Out Quantity (by default this is set to 1). Proceed to Step 10.
- Press Right Arrow to Confirm Check Out Quantity is Correct. Return to Step 7. Repeat Steps 7 to 9 to Check Out multiple items.
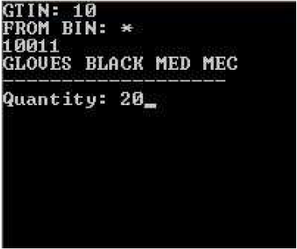
Step 10. Enter in New Check Out Quantity for displayed item.
- Once value is entered press Enter Key - Return to Step 9.
- Press Left and Right Arrow Keys to scroll between item pages.
- Press ENTER key to toggle between Pending and Release status. Release Status will Cancel that line item from Check Out.
- Press ESC Key to Return to Step 7.

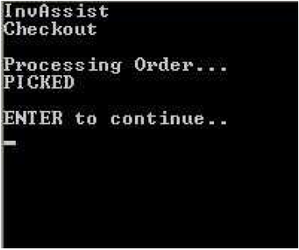
- Press ENTER key to Complete and Return to Step 2.
Related Information
“BIN :” Bin Location. * is set as default bin. Used to represent items without a Bin location assigned.
“BRN# :” refers to Batch/Serial Number. ~ is set as the batch/serial default. Used to represent items not batch/serial tracking.
“LOT# :” Pallet Lot Location. 0 is default pallet Lot Location.
“GTIN” Barcode Number.
Need Assistance?
Call 1800 137 032 Email support@datapel.com